
Gillingham Driving Test Routes – Local Hazards & Pass Tips (2026)
Preparing for your test in Gillingham? Passing at Gillingham isn’t just about driving skill—it’s about mastering the Gillingham driving test routes that often trip learners up. Gillingham is part of the South East England Driving Test Centres network.
As a senior instructor, I’ve seen many skilled learners fail the Gillingham test. It’s rarely about ability—it’s the local pressure of Bowaters Roundabout (A2/A278) or Pier Road One-Way System. Understanding the Guildford driving test routes isn’t just helpful—it’s what helps you feel prepared and confident on test day.
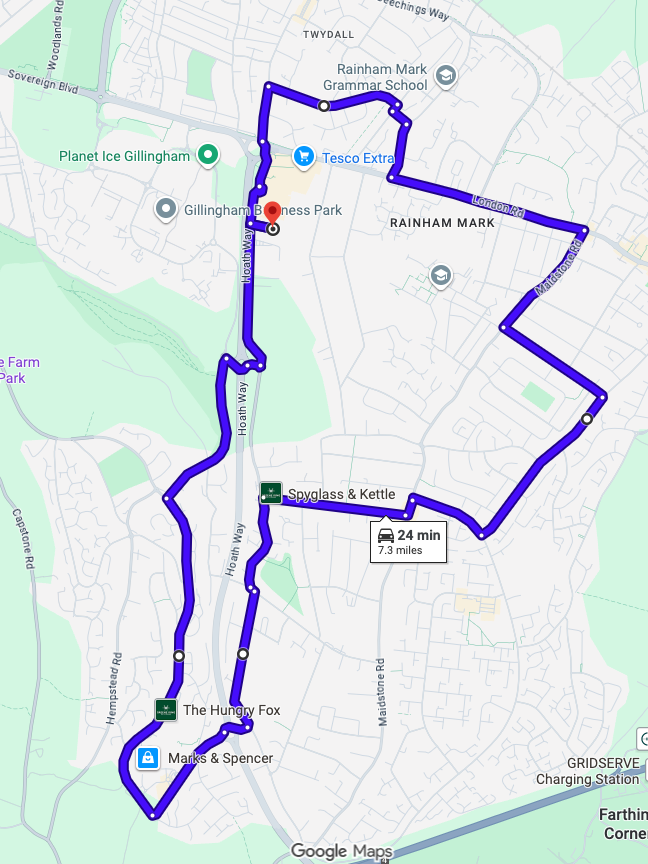
Expertly designed by UK Route Master, based on real Gillingham driving test routes. One tap opens in the Google Maps app you already use.
Gillingham Driving Test Centre Information
📍 Location & Facilities
- Address: Courteney Road, Gillingham, Kent, ME8 0RZ.
- Contact: 0300 200 1122 (Official DVSA).
- Toilets: Available
- Waiting Area: Limited indoor space
- Accessibility: Fully accessible for wheelchair users
- Parking: Limited on-site parking is available for test candidates only.
📊 Testing Intel (2025/26)
- Difficulty: Medium-High
- Major Obstacles: Bowaters Roundabout (A2/A278) or Pier Road One-Way System.
- Key Skill: Spiral Roundabout Discipline and Speed Adaptation
- Pro-Tip (Best Times): 10:00 AM – 2:00 PM
- Avoid: 8:00 AM – 9:30 PM and 3:00 PM – 4:00 PM
⚠️ Essential Candidate Rules
- Arrival: Do not arrive more than 10 minutes early. The car park is compact, and arriving too early causes congestion.
- Book your test via the official DVSA service.
- Change your booking (Give at least 3 working days’ notice to avoid losing your fee).
- Your Vehicle: Private cars must meet DVSA standards (e.g., extra mirror, L-plates, and roadworthiness).
Gillingham Driving Test Routes: Main Roads & Residential Areas
🚦Main Roads & Traffic Flow
- A278 (Hoath Way): A major dual carriageway demanding confident slip road merging and strict focus on 50mph/70mph speed transitions.
- A2 (Watling Street): Extremely busy artery requiring high awareness of active bus lanes, constant traffic light cycles, and yellow box junctions.
- A289 (Gillingham Northern Link): A high-speed bypass often used for Independent Driving, testing navigation through the Medway Tunnel.
- Courteney Road:The test centre doorstep; beware of parked HGVs and large delivery vehicles entering/exiting depots.
- Gillingham Road / Pier Road:Technical urban links used to navigate between the town centre and riverside industrial areas.
🏠 Residential & Hazard Areas
- Twydall Estate:Characterised by a high concentration of mini-roundabouts, evaluating priority judgment and speed control.
- Rainham Side Streets: Densely packed terraced streets ideal for assessing “meeting” skills and spatial awareness.
- Wigmore: Features quieter residential loops frequently selected for reversing tasks and emergency stops.
- Hempstead: Residential suburb containing numerous cul-de-sacs used to test low-speed vehicle control.
- Maidstone Road (Residential): Standard corridor used for steady speed control and moving off from behind parked vehicles.
Gillingham Driving Test Local Hazards: Instructor’s Final Checklist
Key hazard points found along common Gillingham driving test routes, reviewed before test day.
✅ Bus Lanes:
There are active bus lanes on the A2 Sovereignty Way. Check the blue signs for times—if it’s active, stay out.
✅ The Test Centre Exit:
As you pull out of the Gillingham Test Centre, you face a busy industrial junction. Don’t rush; wait for a clear gap.
✅ Pedestrian Awareness:
The area near MidKent College is high-density for students. Scan crossings constantly and expect the unexpected.
✅ The Bowaters Roundabout:
This is a massive, multi-lane junction near ASDA. It features spiral markings that can be confusing. The golden rule: follow your lane lines all the way around. If you realize you’re in the wrong lane, stay in it safely rather than swerving.
✅ Hoath Way (A278):
This dual carriageway connects the town to the M2. It has a 70mph limit that drops suddenly to 40mph. You must demonstrate confident acceleration to merge, but be eagle-eyed for speed limit signs as you approach the residential areas.
Top 10 Local Failure Reasons on Gillingham Driving Test Routes
1.Inadequate Observations (Junctions):
Most frequent fault; failing to judge speeds when emerging from Gillingham Business Park or joining busy A2 sections.
2.Incorrect Lane Discipline (Roundabouts):
Major hurdle at Bowaters and Hempstead Valley; drifting across spiral lanes or choosing wrong exit lanes early.
3.Mirror Use (Change Direction):
Failing to check mirrors before signalling or lane-switching, especially critical on high-speed A289 Ito Way and Yokosuka Way.
4.Response to Road Markings:
Straddling lanes on multi-lane junctions or ignoring directional arrows approaching the High Street/Canterbury Street one-way system.
5.Steering Control (Narrow Streets):
Clipping or mounting the kerb while navigating tight turns and heavy parking in Rainham and Parkwood.
6.Response to Traffic Signs (Speed Limits):
Failing to react to rapid transitions between 20mph residential zones and 40mph/50mph arterial roads like Hoath Way.
7.Control Moving Off (Hill Starts):
Frequent stalling or rolling back on gradients in residential areas like Parkwood and Lower Rainham.
8.Moving Off Safely (Blind Spots):
Failing to perform a full six-point check, including the final right-shoulder blind spot, before pulling away from the kerb.
9.Response to Traffic Lights:
Common errors at major intersections, including stopping beyond advanced stop lines for cyclists or missing green filter arrows.
10.Undue Hesitation:
Failing to take safe gaps at high-volume roundabouts like Will Adams Way, impeding traffic flow during busy periods.
Gillingham Driving Test Routes Pack
Master Gillingham Test Routes – Practise Instantly in Google Maps
✅ Know the Routes, Stay Calm – Familiarise yourself with real exam routes.
✅ No Setup Needed – Open instantly in Google Maps, no app required.
✅ Accurate & Up-to-Date – Verified to 2026 DVSA standards.
✅ Boost Your Confidence – Reduce anxiety before your test.
✅ Instant Access – Start practising immediately after purchase.
Are You Truly Test-Ready?
01.Can you drive for 40 mins without any instructor prompts?
02.Are you confident following Sat Nav signs toward Pier Road One-Way System?
03.Can you handle the Bowaters-roundabouts under pressure?
If yes, our Gillingham driving test routes can be a key part of your test preparation.
Gillingham Driving Test Centre: Frequently Asked Questions
What should I do if I make a mistake during my driving test?
Making a small mistake does not automatically mean you will fail. Examiners assess overall driving safety rather than perfection. Stay calm, continue driving safely, and focus on the next situation. Dwelling on one mistake often leads to further errors.
Which reversing manoeuvres might I be asked to perform?
During the driving test, you will be asked to complete one reversing manoeuvre. This may include parallel parking, reversing into a bay, or pulling up on the right and reversing for a short distance. Only one manoeuvre is assessed during the test.
How does the independent driving section work?
Independent driving lasts around 20 minutes and may involve following road signs, a sat nav, or a combination of both. You are assessed on safe decision-making rather than exact navigation. Taking a wrong turn will not result in a fail if you drive safely.
What are the Show Me, Tell Me questions?
Show Me, Tell Me questions check your basic vehicle safety knowledge. You will be asked one “Tell Me” question before driving and one “Show Me” question while driving. These questions cover topics such as lights, brakes, and windscreen functions.
Can I use my own car for the driving test?
Yes, you can use your own car for the driving test, provided it meets DVSA requirements. The vehicle must be roadworthy, insured for the test, and fitted with an additional rear-view mirror for the examiner.
How long do I need to wait before rebooking after failing a driving test?
If you do not pass your driving test, you must wait at least 10 working days before booking another test. This waiting period applies nationwide and allows time to reflect and prepare before retaking the test.
The Gillingham Pier Area: This area has several narrow roads and industrial junctions. A common mistake here is failing to notice “Stop” signs (which require a complete wheels-stopped halt) versus “Give Way” signs.
No, driving test routes from the Gillingham driving test centre do not include motorways.
Confident Preparation for the Gillingham Driving Test Routes
Preparation is the enemy of anxiety. With our GPS-guided routes, your driving test feels less uncertain and far more familiar.
Get started with UK Route Master and practise the Gillingham driving test routes that matter most—starting today.